The FreeBSD Diary |
| (TM) | Providing practical examples since 1998If you buy from Amazon USA, please support us by using this link. |
|
Configuring IPsec on your XP Professional laptop
22 December 2005
|
|
IPsec is a tool you can use to secure your network communications. I use IPsec to ensure my wireless connections are secured. IPsec offers security and peace of mind over and above the traditional WEP and MAC-address filtering. NOTE: although this article was written with wireless communication in mind, it applies equally well to traditional wired communication as well. I have already written about configuring my FreeBSD IPsec gateway and workstations. In this article I will show how I configured my Windows XP box to use the same gateway. The main resource I used for this exercise was FreeBSD Wi-Fi IPsec easy-setup guide (since removed from the Internet). You might ask why I'm writing about Windows XP on a website about FreeBSD? My terse answer is because I can. My realistic answer is because it will help people. It's something I did, with my FreeBSD gateway. I use XP on a regular basis. Use the right tool for the job. Sometimes that's XP. Sometimes it's FreeBSD. |
|
A recap of the configuration
|
|
I will give a brief overview of the gateway configuration. I have a FreeBSD machine that functions as a dedicated wireless gateway. The primary purpose of this box is to keep out all the stuff that is not allowed and to ensure that only my machines are used on this WAP.
This is the content of the gateways's
I am using racoon as my
key server. It does the job, but I'm hoping for other alternatives. Sometimes I have
to restart racoon on the gateway in order to get a session established. Here is the relevant
portion of By the way, to install racoon from the ports tree, I did this: /etc/rc.conf:
|
|
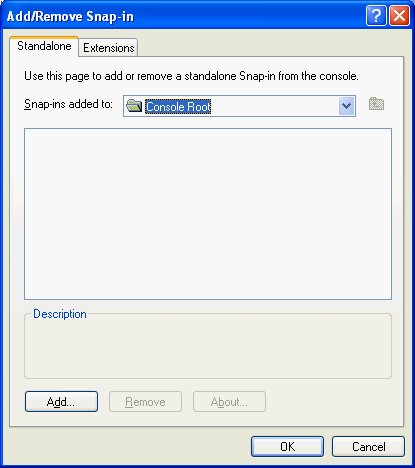
Configuring the XP client
|
|
The Windows XP client should be similar to that found in Windows 2000, and
hopefully Windows 2003. IPsec configuration is performed through the
You should now see something like this: 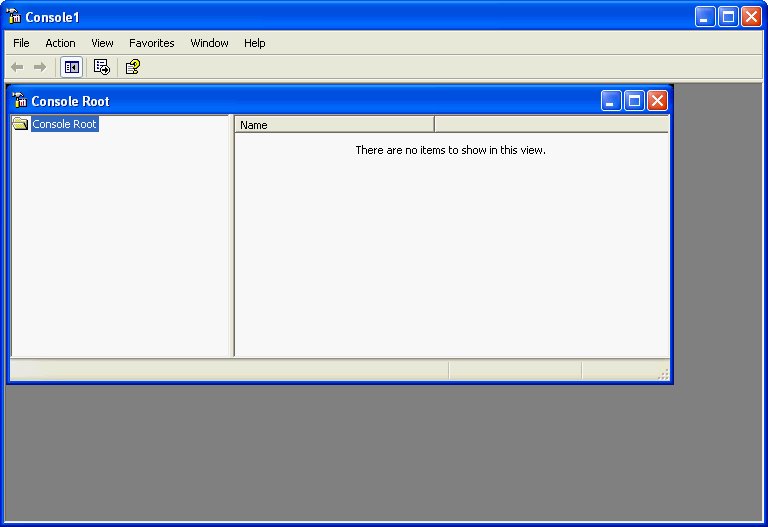
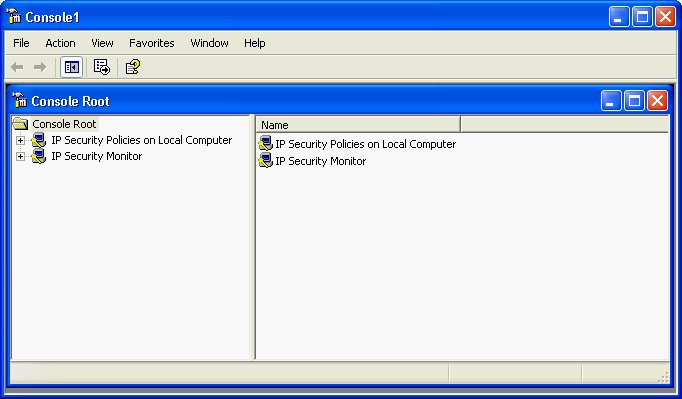
Adding the Security Policy Management Snap-in
Click on
Click on 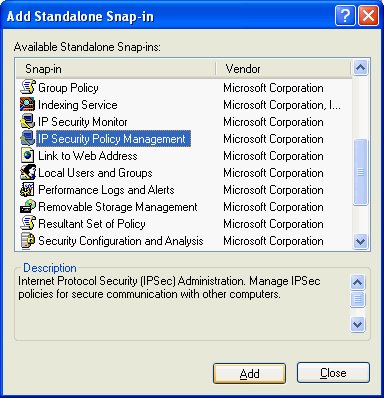
Then you need to select the local computer and click on Finish: 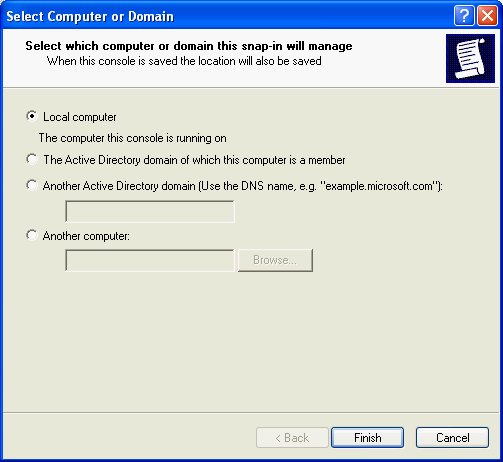
If you are running XP, you should also select the 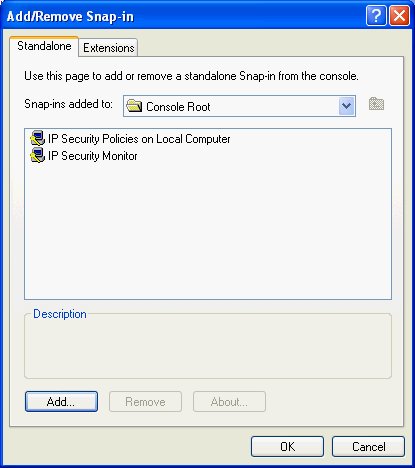
Click on OK, and you'll be back at
NOTE: if you click on
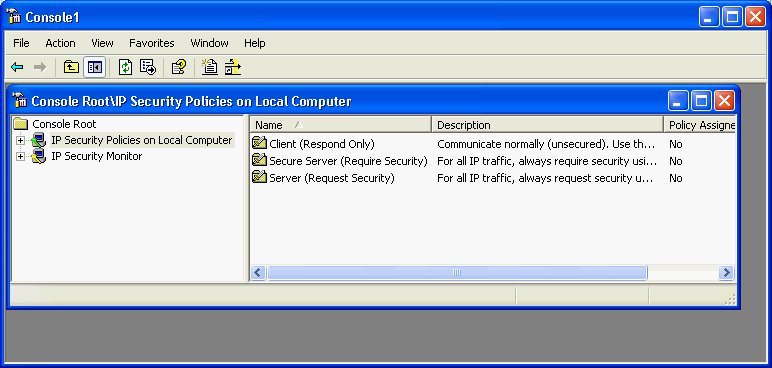
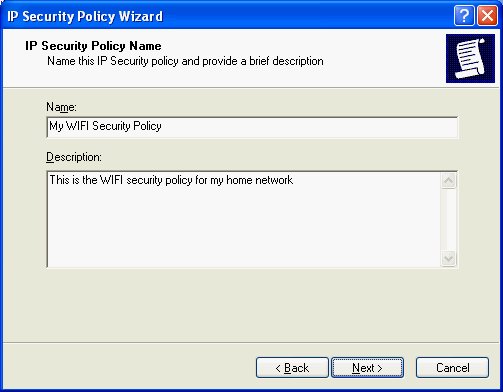
Creating the IP Security Policy
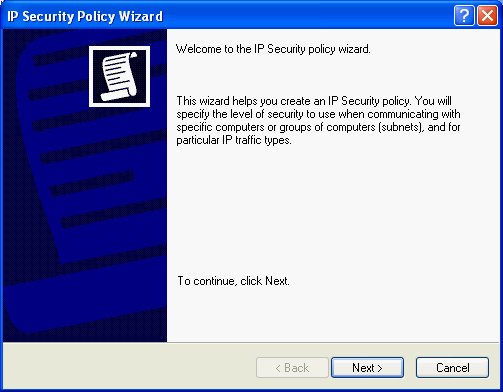
We are now going to create the IP Security Policy we will use on this
laptop. Start this process by right clicking on
Give your policy a name (I called mine My WIFI Security Policy) and a description:
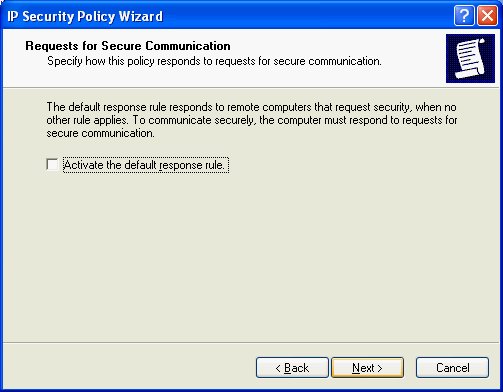
Be sure to uncheck
Also uncheck
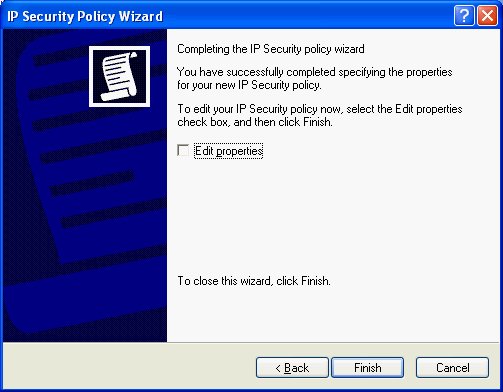
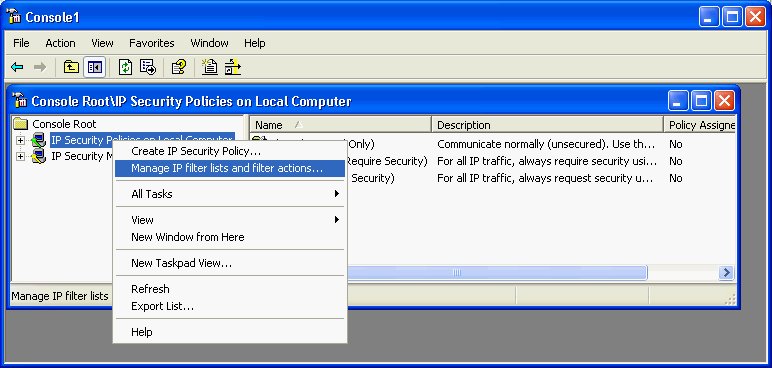
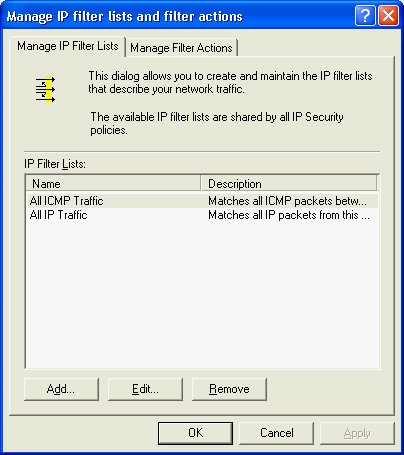
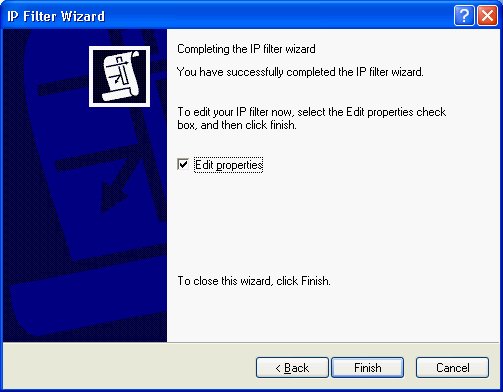
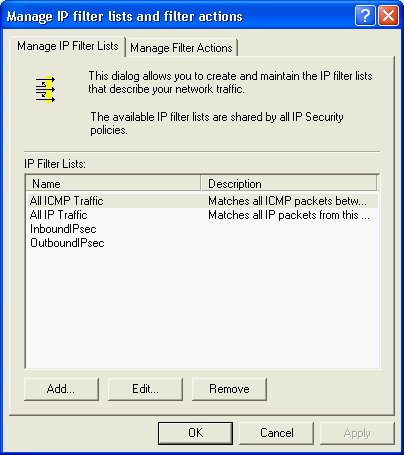
You now have a security policy, although it has no content.. Now we will define filter lists for the inbound and outbound traffic. Create the Outbound filter
Start by right clicking on
Click on
Click on
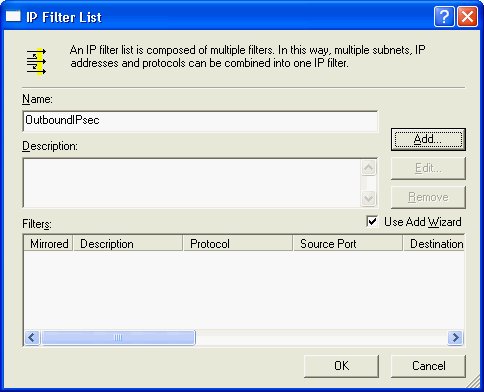
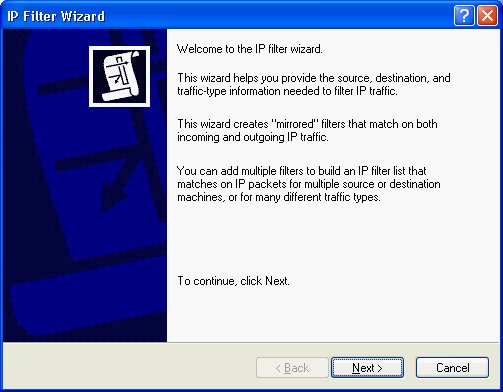
Now we need to add define the filter contents. Click on add and you'll
see the
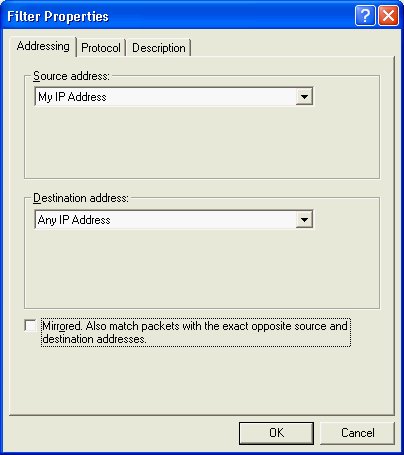
Click on Next and select the Traffic Source. You want
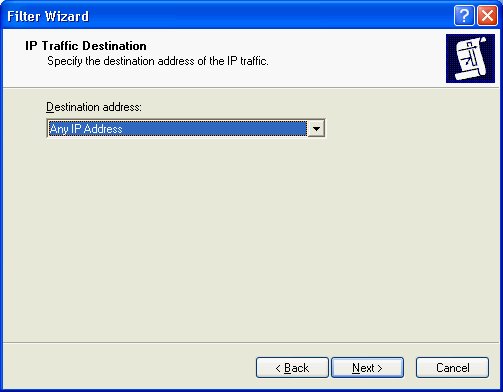
Click on Next and select the Traffic Destination. You want
Protocal type is
Be sure to check the
When you get to the
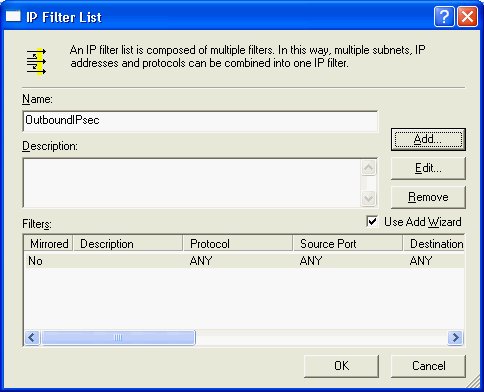
Now you should be back at the
After you clicked OK, you should see this:
You have now created your outbound filter list. Now we will create a similar list for the inbound traffic. Create the Inbound filterYou have just created the outbound filter. Now repeat the same steps again but for inbound traffic. The differences will be:
Remember to check
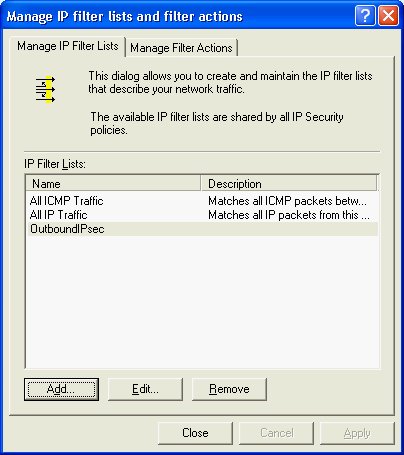
As Timothy Ham cautioned, pay attention to what have now. You should have two entries
in Using the filtersSo far we have:
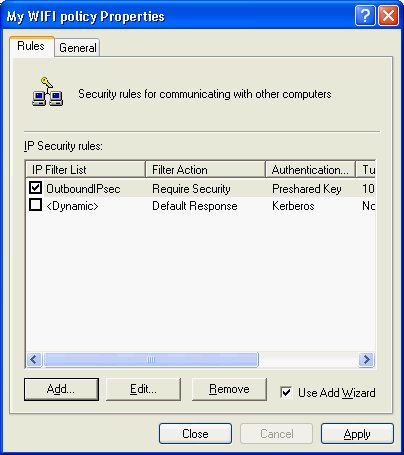
Creating the Outbound Security Rule
Now we will start using the filter lists. Double click on
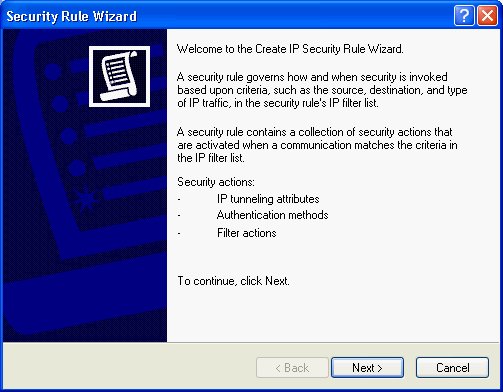
Click on add to start up the Security Rule Wizard:
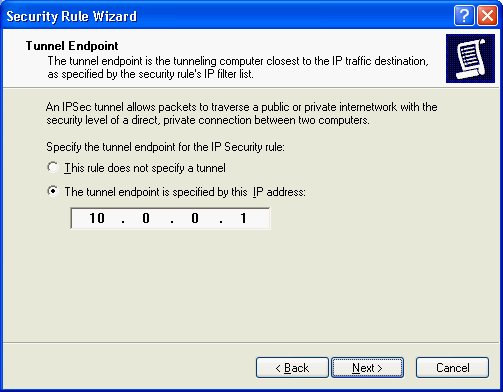
Click Next, and you will see the Tunnel Endpoint window. Click on
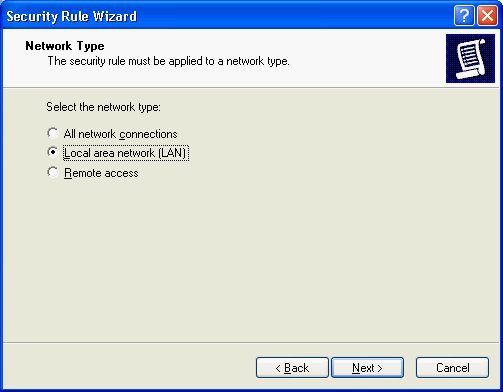
Click on Next, and specify the type of traffic that must be encrypted.
I chose
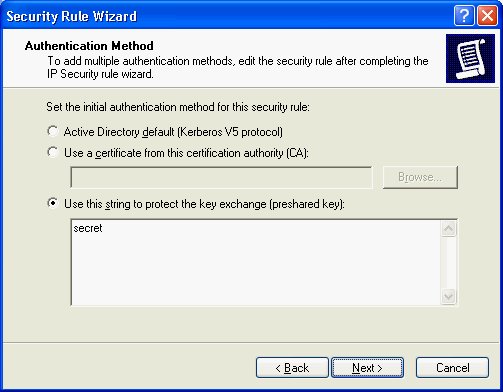
Click on Next and select the Authentication Method. We will be using preshared keys. Enter your key on in the space provided. For testing purposes, I used the word secret.
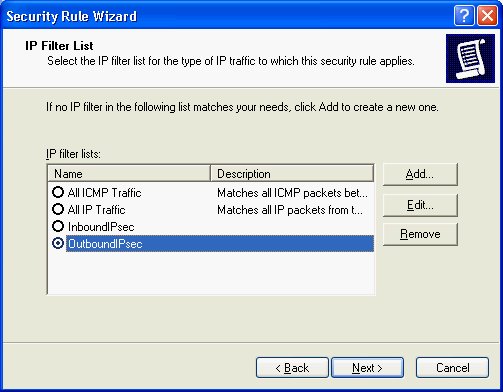
Click Next, and you'll be asked to select the Filter List against which this
security rule should apply. Choose
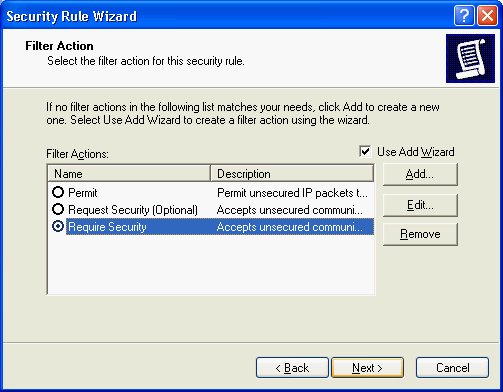
Click on Next. Select the action for this security rule. In this case,
we want
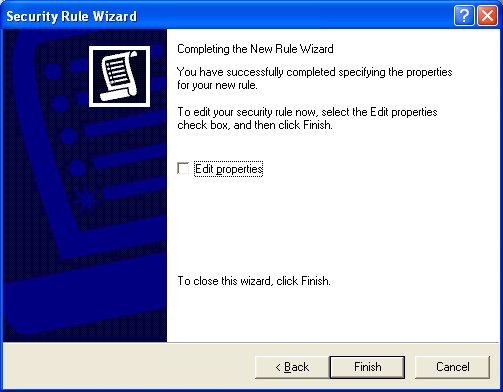
Click on Next, and you will see the last window in the Security Rule Wizard.
Ensure that
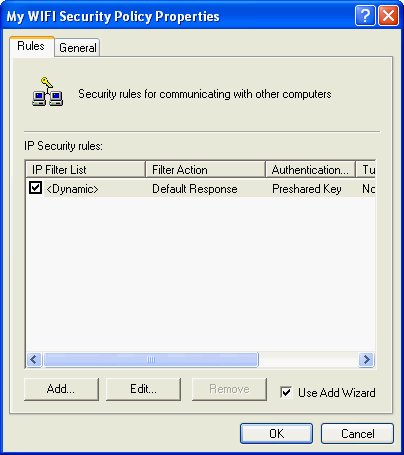
Your policy properties should now look like this:
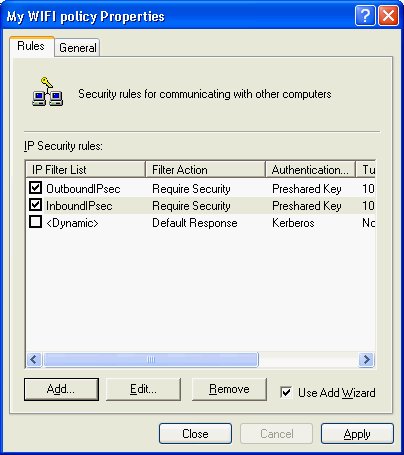
Creating the Inbound Security RuleYou should now repeat the same steps again, but for the Inbound traffic. The differences are:
Once you have completed this, your policy properties should look like this:
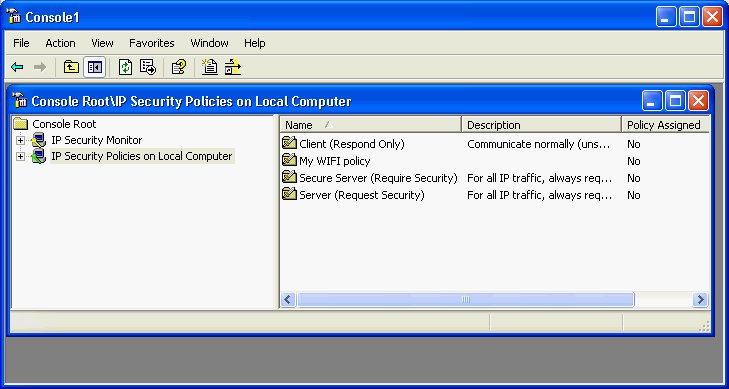
All done, save the resultsHere is what your MMC console should look like now:
You will note that the
Save your data using |
|
Invoking the rules
|
|
So far, we have established a policy, created two filter lists, and added one rule to each filter list. Now we will invoke that policy to ensure that only IPsec traffic flows between the laptop and the wireless gateway.
|
|
Unwanted DNS updates
|
If you start seeing this message in your logs on your DNS server, then I know the fix:
In this case, 192.168.0.20 is the internal IP address of my wireless gateway. That gateway
also has the 10.0.0.1 IP address used above as the end point of the tunnel.
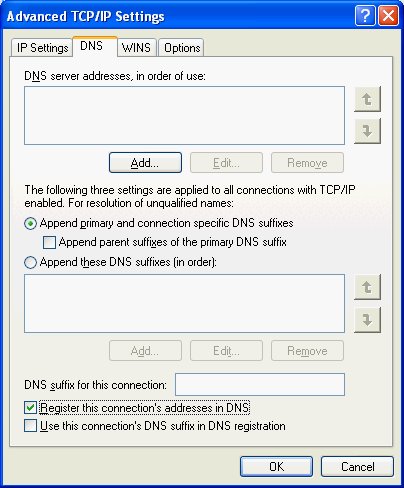
To prevent these DNS updates, turn off connection registration. To do this perform the following steps:
You should not be looking at something like this:
Uncheck |